
Step By Step: Bathroom Handicap Railings Installation
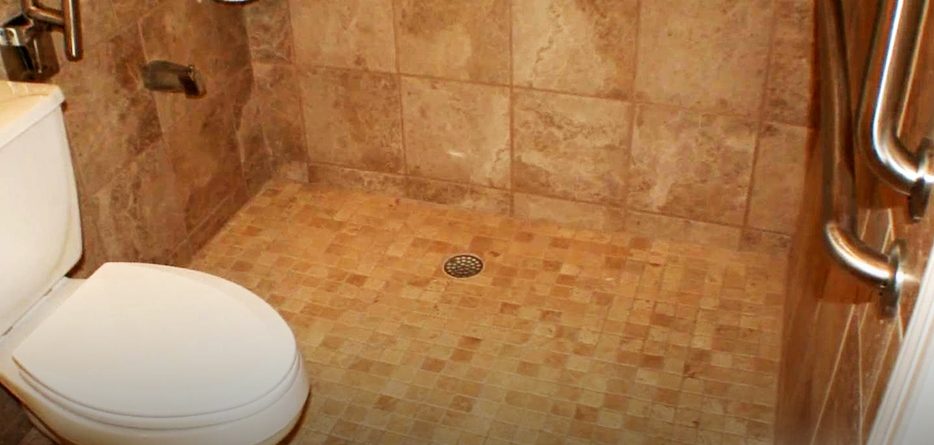
Bathrooms can very tricky places to navigate for people with limited mobility. Ordinary bathrooms simply aren’t safe to use, for elderly and handicapped people; so if you have them in your home, you need to add a handicap bathroom to the house.
One of the most important aspects of such bathrooms is handicap railings. They offer essential support and help people avoid slips and accidents. At Boston Ironworks, we consider handicap railings installation a very easy DIY project that almost everyone can handle. Here’s a step-by-step guide to the process.
1. Position the Railings Well
The railings need to provide proper anchor and support so you can use them to lift yourself from the bathtub or the toilet seat. The railing needs to provide a secure grip so you can either install it completely horizontal or place them at a 45° angle. Both of these positions would provide a comfortable grip.
2. The Height Matters
It’s very important to place the railing at the right height. If you install them too high, they’ll be difficult to reach; but if you install them too low, they won’t offer the right leverage to hoist yourself up or prevent a fall. Experienced installers recommend you place the railing between 33 and 35 inches above the tub floor.
3. Secure it to The Wall
The railing should be able to handle your bodyweight or the force of a fall without coming off the wall and that can only happen if it’s solidly anchored to it. You need to make sure the railing is attached to the wall studs instead of the regular drywall. In most structures, these studs are about 16 inches apart. Most handicap railings are about 24 inches long so if you install the bar at a 45° angle, you can solidly anchor them to two studs. This would help the railings withstand the pressure of a fall better.
4. Drill the Holes and Install the Bar
After you’ve determined the position of the bar, drill the holes in the wall at the right places. On tile surfaces, you might want to use a carbon tip drill at a reverse drill setting to penetrate the porcelain and avoid skipping. After the indentation is formed, you can switch back to the forward setting and drill slowly until you have the right depth and install the bar.
If you want to know more about handicap railings installation, you can call Boston Ironworks at 617 657 3117. You can also fill in this contact us form. We’ll get in touch with you as soon as possible.
Copyright © Boston Ironworks


Leave a Reply